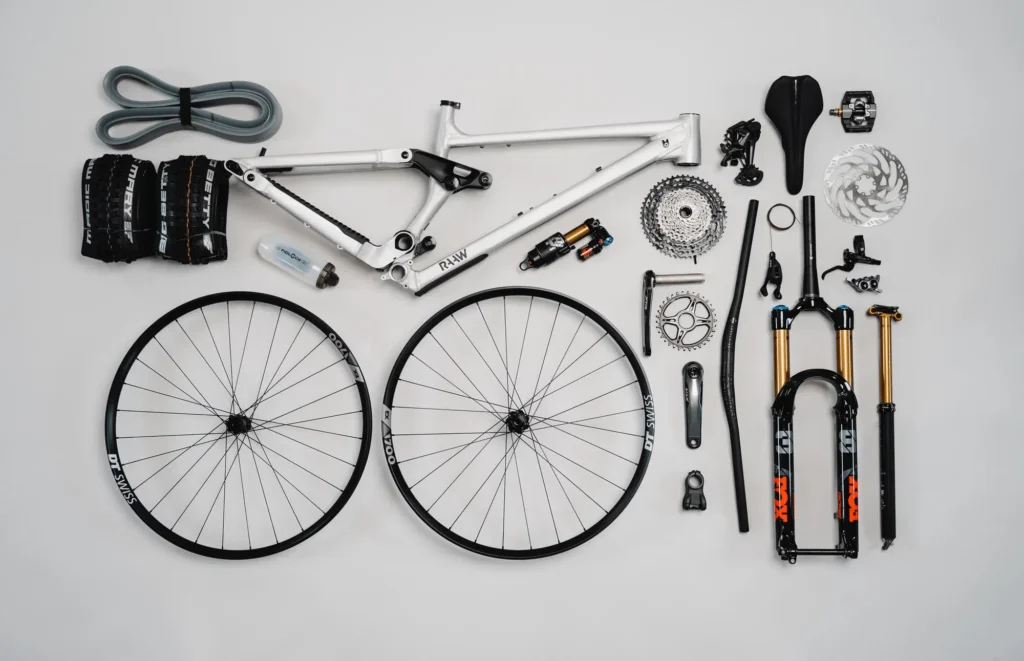
Building your own mountain bike is not just a rewarding try but also a unique opportunity to tailor a bike to your specific needs and preferences. Whether you’re crafting your dream setup for thrilling descents or fine-tuning a build for versatile trail riding, this comprehensive guide will help you assemble your custom mountain bike with confidence.
Essential Components for a Mountain Bike
Frame Selection
The frame forms the backbone of your mountain bike, influencing its performance and durability. Choose a material (aluminum, carbon fiber, or steel) and geometry that suits your riding style.
Wheel Assembly
Select wheels compatible with your frame size and terrain preferences. Variants include tubeless or tube setups, and sizes such as 26-inch, 27.5-inch, or 29-inch based on maneuverability needs.
Suspension System
Suspension systems smooth out rugged terrain. Decide between hardtail (front suspension) or full suspension systems, considering your trails’ demands.
Drivetrain Components
Pick a drivetrain setup, such as 1x or 2x systems, ensuring compatibility with your intended terrain and planned riding efficiency.
Assembling the Mountain Bike
Tools Required for Assembly
Gather essential tools: torque wrenches, hex keys, bike grease, and a workstand. Investing in a quality set simplifies the process.
Step-By-Step Guide to Build
- Begin with attaching the brakes and drivetrain to the frame. 2. Mount wheels and install the suspension system securely. 3. Assemble handlebars, ensuring proper alignment and tightening.
Adjustments and Tuning
Fine-tune gear shifting, suspension settings, and braking mechanisms to ensure operational precision and personal comfort.
Final Inspection and Test Ride
Ensuring the Bike is Ready to Ride
Inspect all fasteners and fittings, confirm the alignment, and check for any loose components.
Safety Checks and Precautions
Verify that brakes operate correctly, reflectors are installed for visibility, and tire pressure meets recommended specifications.
Advanced Customizations and Upgrades
Optimizing the Bike for Your Riding Style
Adjust suspension sag and handlebar tilt to maximize maneuverability and control.
Popular Aftermarket Upgrades
Consider upgrades like dropper seatposts for adjustable riding height or high-performance tires for specific terrain.
Conclusion
Embarking on a custom mountain bike build is a fulfilling process, blending technical skill with personal preference. With this checklist as your guide, you’ll achieve a ride that offers unparalleled satisfaction and reliability on any trail.
FAQs on Building Your Custom Mountain Bike
What key factors should I consider when selecting a mountain bike frame?
Choose a frame based on your riding style, preferred material (such as aluminum or carbon fiber), and the geometry that suits your performance or endurance requirements.
Which step follows the assembly of the brakes and drivetrain in the mountain bike building process?
After assembling the brakes and drivetrain, the next step is to mount the wheels and install the suspension system securely as outlined in the process.
How can a dropper seatpost enhance a mountain bike’s functionality?
A dropper seatpost allows riders to adjust the saddle height dynamically, improving comfort and control on varying terrain during rides.
What basic tools are necessary for assembling a mountain bike at home?
Essential tools include torque wrenches, hex keys, bike grease, and a sturdy workstand to facilitate a smooth assembly process.
Are 29-inch wheels suitable for all types of mountain biking terrain?
29-inch wheels offer great rollover ability and stability, making them suitable for many terrains; however, their reduced maneuverability may not be ideal for tight trails.